A project by Melbourne Makerspace member, John Gay:
My first computer was a TRaSh-80 (TRS-80) from Radio Shack for my 14th Birthday. As the name implies, it was an 8 bit computer based on the Z-80 microprocessor.

It had a whopping 4K (4 thousand bytes) RAM and ran at somewhere around 1Mhz (1 million cycles per second). Compare that to today’s computers with 8 Gigabytes of RAM (8 billion bytes or 2 MILLION times as much) and 3 Ghz (3 billion cycles per second or 3 THOUSAND times faster).
A few years later I found a Timex Sinclair 1000 in a bargain bin. This one only had 1K RAM, but I found a 16K expansion pack that plugged into the back. As well as adding more memory, it also provided random resets from the expansion pack wiggling while typing on the membrane keyboard. This was also based on the Z-80.

It was around this time that Motorola brought out their new 68000 family of processors. While everyone else was maintaining backwards compatibility with their 8-bit lines, Motorola decided to start fresh with the 68000 family with a new 32-bit instruction set. Although many 68000-based computers claimed to be 16-bit, in reality the 68000 was 32-bit internally, only slightly limited by it’s 16 bit external data bus. The same core was also available with an 8-bit bus as the 68008 and a full 32-bit bus on the 68020. But internally, they had the same set of 32-bit registers and used the same instruction set that streamlined the input/output/load/store instructions into a single move instruction instead and also was the first processor to provide multiply and divide instructions. They also had a 24 bit Address bus allowing 4M of address space while everyone else was trapped memory-mapping within the 64K space inherited from the 8-bit backwards compatibility.


Now although I was very interested and excited by this new powerful processor, I was never in a position to buy any of the 68000-based computers at the time. Instead I was using IBM-based PC’s in the Navy. And by the time I could afford my own home computer, the Amiga’s and Mac’s were antiques. But I’ve always wanted to get back to the old machines.
So recently, I found a blog from someone who’d built a 68000 based single board computer. And they’d shared all their design files as well as an excellent description to explain the entire system.
http://jefftranter.blogspot.com/search/label/68000 includes all the blog posts describing the development of his system. Starting from free-running the processor on a breadboard, to wire-wrapping version 1 of his design before committing to a circuit board design.
https://github.com/jefftranter/68000/tree/master/TS2/v2.1 this github account has all his circuit board design files in KiCAD format and includes gerber files in case anyone wants to build their own board. And this is where I got started.
I sat on this discovery for just over a year before I finally committed to buying a set of boards from https://www.jlcpcb.com My initial hesitation was that I was contemplating many different upgrades to the original project despite my limited practical experience. But after I bought a Z-80 single board computer and got it running BASIC, I decided I had to jump in.
The original design uses 8K RAM and EEPROM chips for memory. 4 of each and they are arranged in pairs for the 16 bit data bus. So that is 16K X 16 bits EEPROM for firmware and 16K X 16 bits RAM for user programming space. And there are several versions of BASIC, Forth and an assembly-level monitor program called TUTOR that was developed by Motorola for the educational board this one is based on.
But I noticed that there are 32K RAM and EEPROM chips that are pin-compatible with the 8K chips used. So I’ve poked around in the schematics and have made simple modifications to allow using these 32K chips instead. But I’ve already got the original boards now.
So my first goal is to build the first board exactly as designed with the 8K chips and make sure I can get that running. Once I’ve proven that it works for my, I plan to modify the next board by cutting a few traces and adding a few bypass wires to see if the memory expansion I’ve designed works. As I’ve designed it now, I’ll have 64K X 16 bits EEPROM and 64K X 16 bits RAM. But I’ve also considered changing 2 of the EEPROM sockets from more RAM sockets, which would give me 32K X 16 bits EEPROM and 96K X 16 bits RAM for programming space. I also considered going much bigger with the memory as must larger chips are available, but that would mean changing the 28-pin sockets for 32-pin ones and a major re-design of the board.
As the project stands now, I’ve got 5 circuit boards and enough parts to populate almost 3. But I’m waiting on a late order of sockets for the processor and memory chips. Once those come in, I’ll solder up the first board and populate it. Then I’ll load the TUTOR into a pair of EEPROMs and see if I get a response from the FTDI serial interface. I’d really like to get an Amiga clone running, but I wouldn’t even know where to begin on the video display circuitry.
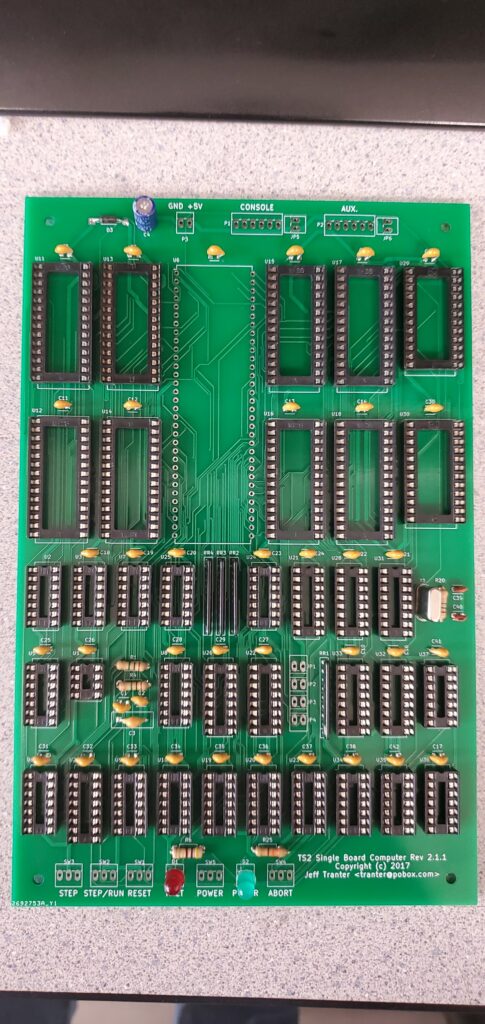
Here are some photos and screenshots of the first board I created.
